【注意】最后更新于 March 10, 2017,文中内容可能已过时,请谨慎使用。
最近有同学要安装hexo,给他找了找教程,结果总是不对。我自己试了试,发现好多教程莫名其妙的一致,还都不大好理解,跟现在的3.0还都不一样了,就萌生了自己重新写教程的想法。
hexo的安装教程实际上并不复杂。
github相关
注册github账户,注册地址github注册,注册过程也比较简单,就不过多赘述。
下载git的windows客户端,我下载的是位于github的地址,下载地址git客户端
安装过程一路next就好,安装好后桌面会有git shell以及github这两个应用程序。
用github这个登陆,这样使用gitshell的时候比较方便。
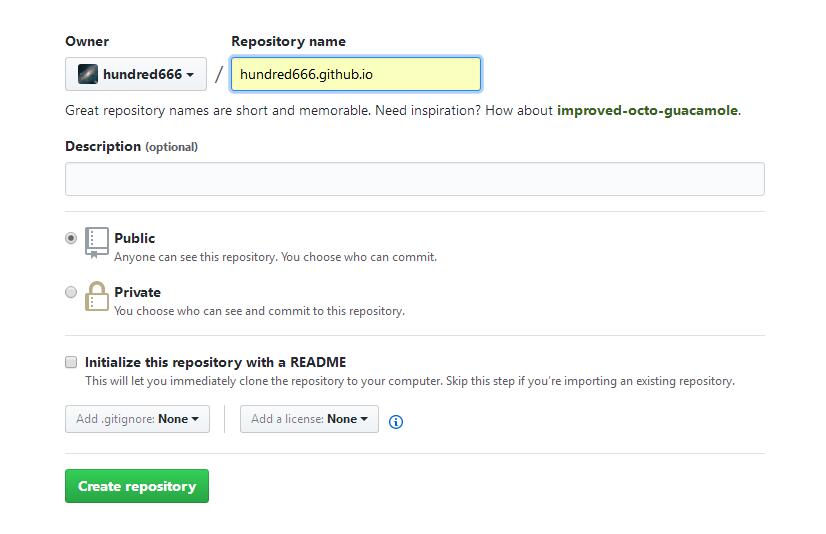
打开github官网,创建一个新的仓库
 输入仓库名,注意,必须是你的用户名.github.io,比如我的账户是hundred666,那么仓库的名称是hundred666.github.io,如图所示
 出现这个提示
 这个给的地址记一下,我的地址是http://github.com/hundred666/hundred666.github.io.git,接下来我们还要用。
接下来github端的设置就做好啦。我们开始做另外的本地相关的。
这个给的地址记一下,我的地址是http://github.com/hundred666/hundred666.github.io.git,接下来我们还要用。
接下来github端的设置就做好啦。我们开始做另外的本地相关的。
nodejs
从官网下载nodejsnodejs
然后一路next就好。
hexo配置
这一步是最重要的,也是网上几乎教程都一致的,但是跟目前版本不太相符合的。
假设我想把博客的文件放到F:\工作\website\blog目录里面,打开git shell,切换到这个目录下
然后输入
1
|
npm install hexo-cli -g
|
将hexo的基础先安装上。
安装好会出现类似这样的提示
1
2
3
4
5
6
|
$ npm install hexo-cli -g
C:\Users\Hundred\AppData\Roaming\npm\hexo -> C:\Users\Hundred\AppData\Roaming\npm\node_modules\hexo-cli\bin\hexo
C:\Users\Hundred\AppData\Roaming\npm`-- hexo-cli@1.0.2

npm WARN optional SKIPPING OPTIONAL DEPENDENCY: fsevents@^1.0.0 (node_modules\hexo-cli\node_modules\chokidar\node_modules\fsevents):
npm WARN notsup SKIPPING OPTIONAL DEPENDENCY: Unsupported platform for fsevents@1.1.1: wanted {"os":"darwin","arch":"any"} (current: {"os":"win32","arch":"x64"})
|
代表安装完成
接下来初始化blog这个文件夹,命令行输入
接下来会下载一堆东西,出现的内容比较多
 1
 2
 3
 4
 5
 6
 7
 8
 9
10
11
12
13
14
|
INFO  Cloning hexo-starter to F:\工作\website\blog
Cloning into 'F:\工作\website\blog'...
remote: Counting objects: 53, done.
remote: Total 53 (delta 0), reused 0 (delta 0), pack-reused 53
Unpacking objects: 100% (53/53), done.
Submodule 'themes/landscape' (https://github.com/hexojs/hexo-theme-landscape.git) registered for path 'themes/landscape'
Cloning into 'F:/工作/website/blog/themes/landscape'...
Submodule path 'themes/landscape': checked out 'decdc2d9956776cbe95420ae94bac87e22468d38'

...

npm WARN optional SKIPPING OPTIONAL DEPENDENCY: fsevents@^1.0.0 (node_modules\chokidar\node_modules\fsevents):
npm WARN notsup SKIPPING OPTIONAL DEPENDENCY: Unsupported platform for fsevents@1.1.1: wanted {"os":"darwin","arch":"any"} (current: {"os":"win32","arch":"x64"})
INFO  Start blogging with Hexo!
|
代表初始化完成了。
然后执行
提示的代码很简短,大体就像
1
2
|
npm WARN optional SKIPPING OPTIONAL DEPENDENCY: fsevents@^1.0.0 (node_modules\chokidar\node_modules\fsevents):
npm WARN notsup SKIPPING OPTIONAL DEPENDENCY: Unsupported platform for fsevents@1.1.1: wanted {"os":"darwin","arch":"any"} (current: {"os":"win32","arch":"x64"})
|
好了,这下hexo安装好了,命令行输入
如果命令行提示
1
2
|
INFO  Start processing
INFO  Hexo is running at http://localhost:4000/. Press Ctrl+C to stop.
|
代表启动成功了,浏览器输入localhost:4000访问
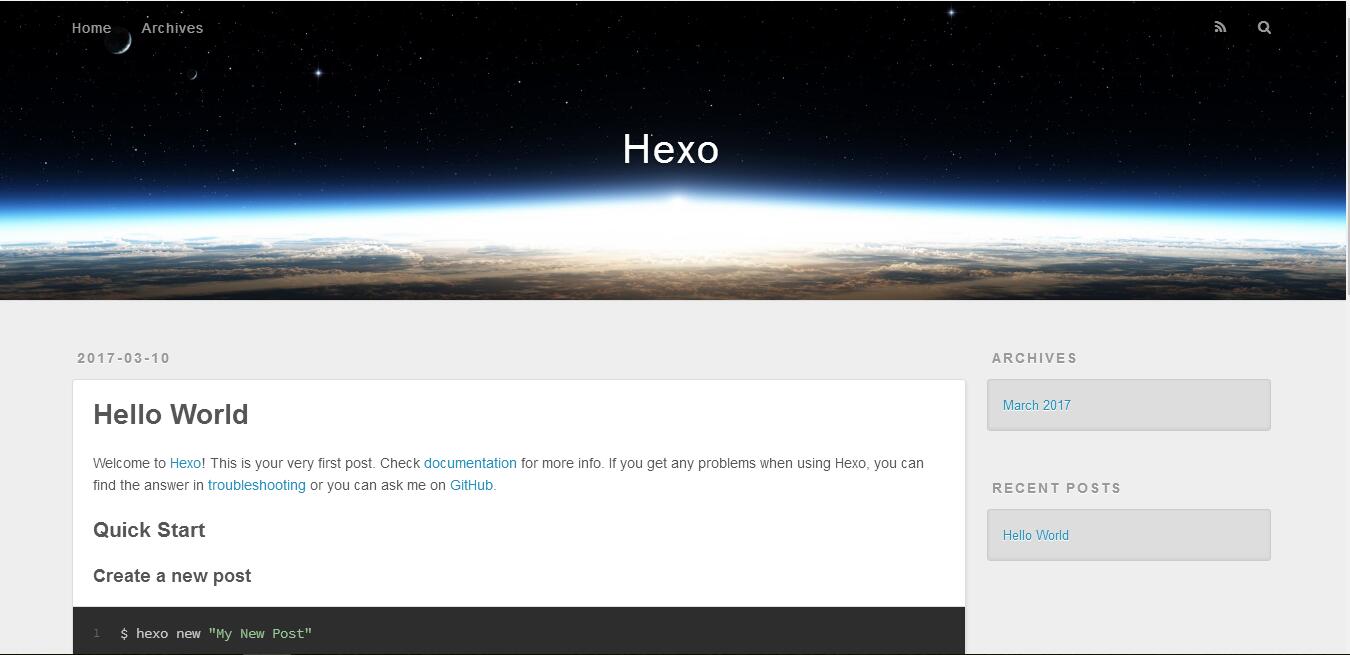 好了,本机成功了。
运行是运行了,可是怎么添加自己的文章呢?
只需命令行输入
好了,本机成功了。
运行是运行了,可是怎么添加自己的文章呢?
只需命令行输入
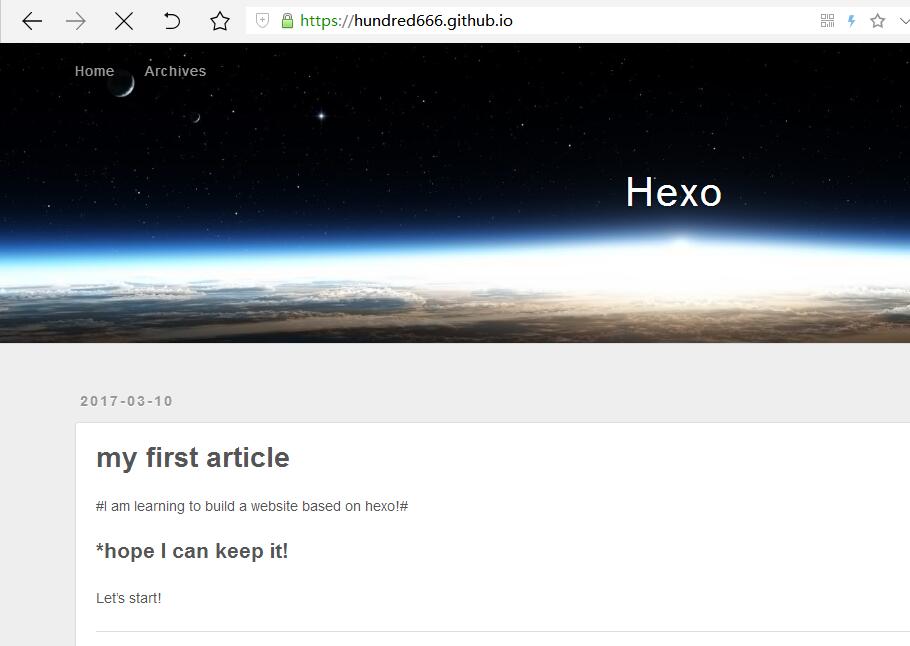
就好了,比如我想创建一篇名字叫做my first artile的文章,只需要输入
1
|
hexo new "my first artile"
|
就可以啦
命令行提示
1
|
INFO Created: F:\工作\website\blog\source\_posts\my-first-article.md
|
打开这个目录,修改这个my-first-article.md .md文件。用sublime,editplus++之类的都可以修改。
比如我随便这么写的
1
2
3
4
5
6
7
8
9
|
---
title: my first article
date: 2017-03-10 14:52:12
tags: hello ,test
---
#I am learning to build a website based on hexo!#
*hope I can keep it!
----
Let's start!
|
然后命令行打开输入
出现类似的结果
 1
 2
 3
 4
 5
 6
 7
 8
 9
10
11
12
13
14
15
16
17
18
19
20
21
22
23
24
25
26
27
28
29
30
31
32
33
|
INFO  Start processing
INFO  Files loaded in 264 ms
INFO  Generated: index.html
INFO  Generated: archives/index.html
INFO  Generated: fancybox/blank.gif
INFO  Generated: fancybox/jquery.fancybox.css
INFO  Generated: fancybox/fancybox_loading@2x.gif
INFO  Generated: fancybox/jquery.fancybox.pack.js
INFO  Generated: fancybox/fancybox_overlay.png
INFO  Generated: fancybox/fancybox_loading.gif
INFO  Generated: fancybox/jquery.fancybox.js
INFO  Generated: archives/2017/index.html
INFO  Generated: fancybox/fancybox_sprite.png
INFO  Generated: fancybox/fancybox_sprite@2x.png
INFO  Generated: tags/hello-test/index.html
INFO  Generated: archives/2017/03/index.html
INFO  Generated: css/fonts/FontAwesome.otf
INFO  Generated: js/script.js
INFO  Generated: fancybox/helpers/jquery.fancybox-media.js
INFO  Generated: fancybox/helpers/jquery.fancybox-buttons.css
INFO  Generated: css/style.css
INFO  Generated: css/fonts/fontawesome-webfont.eot
INFO  Generated: fancybox/helpers/jquery.fancybox-thumbs.css
INFO  Generated: css/fonts/fontawesome-webfont.woff
INFO  Generated: fancybox/helpers/fancybox_buttons.png
INFO  Generated: fancybox/helpers/jquery.fancybox-thumbs.js
INFO  Generated: fancybox/helpers/jquery.fancybox-buttons.js
INFO  Generated: css/fonts/fontawesome-webfont.svg
INFO  Generated: css/fonts/fontawesome-webfont.ttf
INFO  Generated: 2017/03/10/my-first-article/index.html
INFO  Generated: 2017/03/10/hello-world/index.html
INFO  Generated: css/images/banner.jpg
INFO  30 files generated in 888 ms
|
然后再
浏览器打开,可以看到增加了一篇文章

部署到服务器
主要是这块变化比较大
1.网上好多说用ssh-keygen的,这个地方实际上可以不执行,因为咱们使用的git shell,已经拥有登入权限啦。
打开blog目录下的_config.yml文件,找到最下面,有个deploy的改成类似这样的
1
2
3
4
5
6
|
# Deployment
## Docs: https://hexo.io/docs/deployment.html
deploy:
  type: git
  repository:  http://github.com/hundred666/hundred666.github.io.git
  branch: master
|
注意中间的空格,type就是git,repository地址就是刚开始让咱们记住的那个地址,注意不要用https,而是用http。
这样就是修改好啦。再命令行输入
结果有可能会提示
1
|
ERROR Deployer not found: git
|
只需要安装一个工具就好了,命令行输入
1
|
npm install hexo-deployer-git --save
|
再执行deploy就好啦。
出现类似的结果
 1
 2
 3
 4
 5
 6
 7
 8
 9
10
11
|
INFO  Deploying: git
INFO  Setting up Git deployment...
Initialized empty Git repository in F:/工作/website/blog/.deploy_git/.git/
[master (root-commit) 5983a1b] First commit

...

Branch master set up to track remote branch master from http://github.com/hundred666/hundred666.github.io.git.
To http://github.com/hundred666/hundred666.github.io.git
 * [new branch]      HEAD -> master
INFO  Deploy done: git
|
好了,打开浏览器输入hundred666.github.io访问就好啦